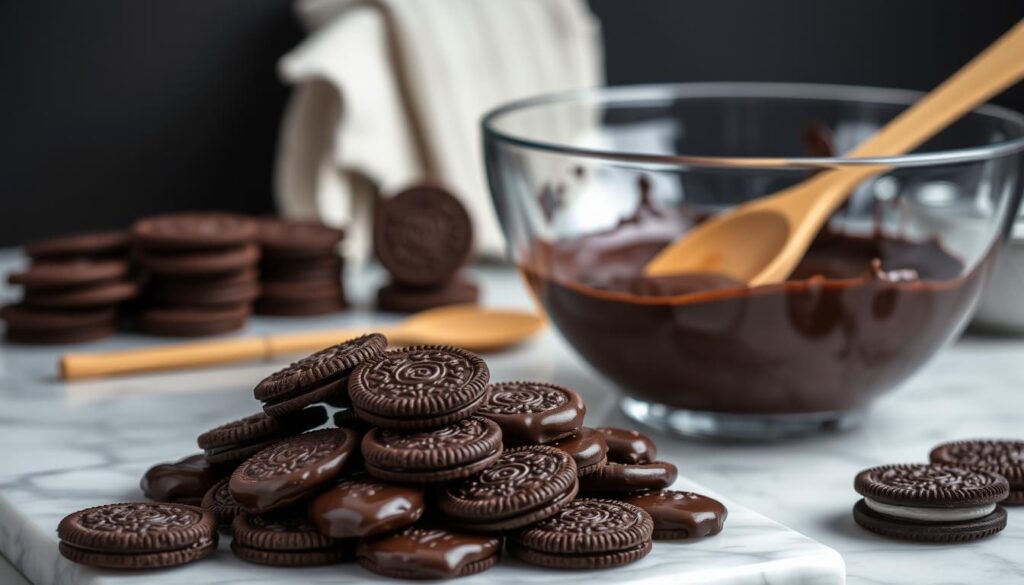
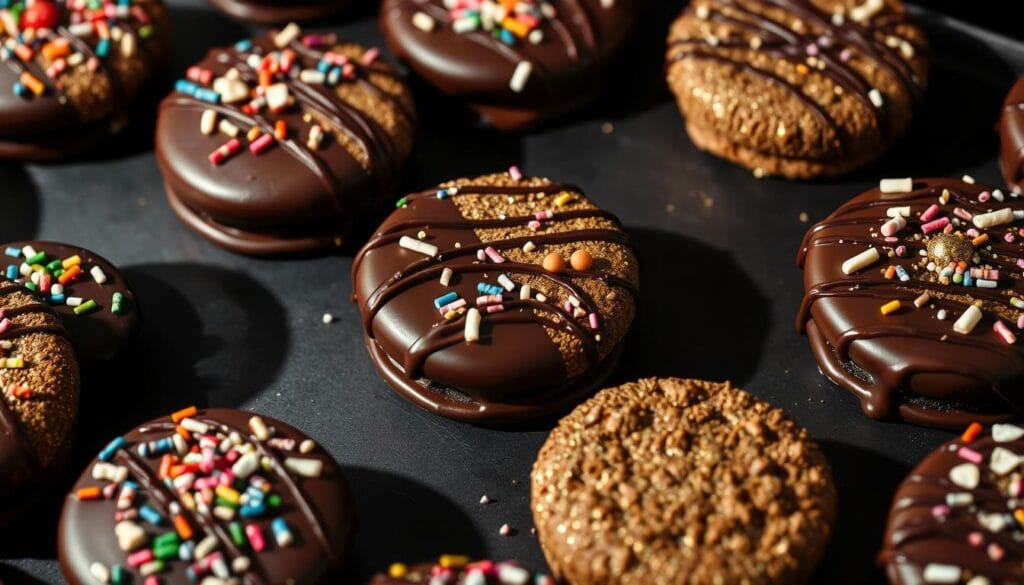
Imagine turning a classic Oreo cookie into a luxurious treat in your kitchen. Chocolate covered Oreos are more than a simple dessert. They’re a canvas for creativity and a crowd-pleaser that takes the beloved cookie to new heights.
These treats combine the iconic crunch of Oreos with a smooth chocolate coating. It melts in your mouth. Whether you want to impress guests or treat yourself, chocolate covered Oreos offer a simple yet sophisticated dessert experience. Anyone can master it.
Key Takeaways
- Chocolate covered Oreos are easy to make at home
- Perfect for special occasions and casual snacking
- Customizable with various chocolate and decorative options
- Great for gifts and party desserts
- Requires minimal ingredients and basic cooking skills
What Makes Chocolate Covered Oreos So Special
Chocolate covered Oreos are a favorite treat that mixes a classic cookie with rich chocolate. They offer a unique taste experience that wins over dessert fans everywhere.
The Perfect Balance of Crunch and Chocolate
The magic of chocolate covered Oreos is in their amazing texture mix. Each bite gives a crunchy cookie center and a smooth chocolate outside. This mix creates a treat that’s hard to resist.
- Crisp cookie interior
- Rich chocolate coating
- Irresistible flavor profile
History of This Popular Treat
Chocolate covered Oreos started as a creative twist on the classic Oreo. Food lovers and bakeries began making chocolate-dipped versions. This idea quickly became a hit, both at home and in stores.
Why They’re Perfect for Any Occasion
Chocolate covered Oreos are versatile. They’re great for parties, quick desserts, or just a sweet treat. They’re perfect for any time, whether it’s a casual snack or a fancy dessert.
- Party appetizers
- Dessert platters
- Gifts for loved ones
- Midnight snack
The love for chocolate covered Oreos keeps growing. They remain a favorite for cookie and chocolate fans.
Essential Ingredients for Chocolate Covered Oreos
Making chocolate covered Oreos is all about the ingredients. Your treats will be amazing if you pick each part carefully. The secret to great chocolate covered Oreos is using top-notch ingredients that go well together.
Core Ingredients You’ll Need
- Original Oreo cookies
- Premium chocolate for coating
- Optional decorative toppings
- Parchment paper
Choosing the right chocolate is key. Different chocolates can change the taste and feel of your treat.
Chocolate Varieties for Coating
| Chocolate Type | Flavor Profile | Melting Difficulty |
|---|---|---|
| Dark Chocolate | Rich, intense | Medium |
| Milk Chocolate | Sweet, creamy | Easy |
| White Chocolate | Smooth, delicate | Challenging |
For the best results, pick chocolate with lots of cocoa butter. This gives a shiny, smooth finish that looks and tastes great. Fresh Oreo cookies are crucial – they make the perfect base for your chocolate.
Additional Flavor Enhancers
- Sprinkles
- Crushed nuts
- Drizzled chocolate
- Edible glitter
Your chocolate covered Oreos can be simple or fancy. The right ingredients turn a basic cookie into a fancy dessert that wows everyone.
Step-by-Step Guide to Making Chocolate Covered Oreos

Making chocolate covered Oreos at home is simple. Just a few steps can turn regular Oreos into gourmet treats. This guide will show you how to make perfect chocolate covered Oreos.
Creating chocolate covered Oreos needs precision and patience. Knowing each step and practicing is key.
Melting Chocolate Properly
Choosing the right way to melt chocolate is important for smooth Oreos. You can melt chocolate in two ways:
- Double boiler method for gentle melting
- Microwave method for quick melting
Pro tip: Always use high-quality chocolate. Melt it slowly to avoid burning or seizing.
Dipping Techniques
Dipping Oreos needs a steady hand and the right tools. Here’s how to get perfect chocolate coverage:
- Use a dipping fork or special chocolate dipping tool
- Completely submerge the Oreo in melted chocolate
- Gently tap off excess chocolate
Cooling and Setting Methods
Proper cooling gives your Oreos a glossy finish. Try these setting techniques:
| Method | Time | Result |
|---|---|---|
| Room Temperature | 30-45 minutes | Soft, slightly glossy finish |
| Refrigerator | 10-15 minutes | Quick set, firmer texture |
With practice, you’ll get great at making chocolate covered Oreos. They’re perfect for parties, gifts, or treats for yourself.
Best Types of Chocolate to Use

Choosing the right chocolate is key to making tasty chocolate covered Oreos. The chocolate you pick can change the taste and look of this favorite treat. Not all chocolates are the same, and knowing their differences helps make the best chocolate covered Oreos.
When picking chocolate for Oreos, consider these main types:
- Dark Chocolate: Offers rich, intense flavor with less sweetness
- Milk Chocolate: Provides creamy, classic sweetness
- White Chocolate: Creates a smooth, vanilla-like coating
Quality is important for chocolate covered Oreos. Experts say to use couverture chocolate, which has more cocoa butter. This chocolate melts well and gives your Oreos a shiny, professional look.
Here are some tips for choosing chocolate:
- Check chocolate cocoa percentage
- Use high-quality chocolate brands
- Avoid chocolate with additives
- Select chocolate specifically designed for melting and coating
Your chocolate covered Oreos will only be as good as the chocolate you choose. Try different chocolate types to find your favorite mix of taste and texture.
Creative Decorating Ideas and Toppings
Turn your chocolate covered Oreos into stunning works of art with creative decorating. Whether it’s for a special event or just to impress, these ideas will help you decorate like a pro.
Seasonal Decorating Options
Make your chocolate covered Oreos stand out with seasonal themes. Here are some festive ideas:
- Christmas: Red and green sprinkles, candy cane crushed pieces
- Halloween: Orange and black sanding sugar, spooky chocolate drizzles
- Valentine’s Day: Pink and white heart-shaped sprinkles
- Fourth of July: Red, white, and blue nonpareils
Professional Finishing Touches
Get a polished look with these expert tips:
- Use high-quality chocolate for smooth coating
- Tap excess chocolate off gently
- Allow proper cooling time between layers
- Use clean, precise drizzling methods
Color and Pattern Techniques
Make your chocolate covered Oreos visually stunning with these color and pattern ideas:
| Technique | Description | Difficulty Level |
|---|---|---|
| Marble Effect | Swirl different chocolate colors | Intermediate |
| Geometric Patterns | Use precision piping tools | Advanced |
| Solid Color Dip | Complete single-color coating | Beginner |
Try these techniques to make Instagram-worthy chocolate covered Oreos. They’ll wow your friends and family at any event.
Storage Tips and Shelf Life
Keeping your chocolate covered Oreos fresh is key. They can stay tasty and crunchy if you store them right.
Chocolate covered Oreos stay fresh in a cool, dry place. Avoid heat, moisture, and sunlight. This keeps their chocolate coating crisp and the Oreo center creamy.
Best Storage Practices
- Store chocolate covered Oreos in an airtight container
- Keep them at room temperature (60-70°F)
- Avoid refrigeration to prevent moisture condensation
- Place parchment paper between layers to prevent sticking
Chocolate covered Oreos last 7-14 days when stored right. Bakers say they taste best within a week.
Storage Environment Recommendations
| Storage Location | Expected Freshness |
|---|---|
| Pantry (cool, dry) | Up to 2 weeks |
| Room Temperature | 1 week |
| Warm Environment | 3-5 days |
Enjoy your chocolate covered Oreos within a few days. Proper storage means every bite is a delight.
Common Mistakes to Avoid When Making Chocolate Covered Oreos
Making perfect chocolate covered Oreos needs care and detail. Even skilled bakers can face problems that affect their treats’ quality. Knowing these issues helps you make delicious chocolate covered Oreos.
Chocolate covered Oreos might seem easy, but mistakes can happen. Knowing these common problems ensures your treats look great and taste wonderful.
Temperature Control Challenges
Temperature is key for smooth chocolate covered Oreos. Wrong temperatures cause several issues:
- Chocolate seizing when overheated
- Uneven coating due to inconsistent melting
- Chocolate developing an unappealing white film
Coating Problems and Solutions
Getting a perfect chocolate coat needs skill and technique. Here are common coating issues and how to fix them:
| Problem | Solution |
|---|---|
| Thick, uneven chocolate layer | Use a thin, consistent chocolate dipping method |
| Chocolate cracking after cooling | Maintain consistent room temperature during coating |
| Oreo cookie breaking during dipping | Gently handle cookies and use proper dipping tools |
Patience and practice are crucial for chocolate covered Oreos. Start with small batches to get better. Don’t worry about early mistakes. With time, you’ll make stunning chocolate covered Oreos that look and taste amazing.
Packaging and Gift-Giving Ideas
Your homemade chocolate covered Oreos need to look amazing. Gift packaging turns these treats into memorable gifts. Choose clear cellophane bags or fancy boxes to show off the Oreos and keep the chocolate safe.
Think about the season when picking packaging. For winter, use festive metallic papers or rustic kraft boxes with ribbons. Summer calls for bright colors and clear packaging to show off the chocolate’s shine. Personalized labels make your gift feel extra special.
Both pros and home cooks know presentation is key. Stack your Oreos in boxes with parchment paper between layers to avoid sticking. Decorative tissue paper adds a nice touch. Your chocolate covered Oreos will be a hit with thoughtful packaging.
Consider individual packaging for your chocolate covered Oreos. Mason jars, small cookie tins, and custom boxes are great choices. Add a note about your creation to make it even more special. Your chocolate covered Oreos will bring joy to your loved ones.
FAQ
How long do chocolate covered Oreos stay fresh?
Chocolate covered Oreos stay fresh for 1-2 weeks if stored right. Keep them in an airtight container at room temperature. Make sure they’re in a cool, dry place, away from sunlight and heat.
Can I use different types of chocolate for coating?
Yes, you can! Use dark, milk, or white chocolate for a unique taste. Each chocolate type gives a different look and flavor to your treats.
What are some creative decorating ideas for chocolate covered Oreos?
Get creative with sprinkles, drizzled chocolate, or colored candy melts. Add crushed nuts, edible glitter, or themed decorations for holidays. These make your Oreos look amazing.
Do I need any special equipment to make chocolate covered Oreos?
You’ll need basic tools like a microwave or double boiler for melting chocolate. Also, a dipping fork or spoon and parchment paper for cooling and setting.
How can I prevent the chocolate from cracking when coating Oreos?
To avoid cracking, melt the chocolate smoothly and at the right temperature (86-90°F). Don’t change the temperature suddenly. Let the Oreos set slowly at room temperature.
Are chocolate covered Oreos good for gift-giving?
Yes, they’re perfect for gifts! Package them in decorative boxes, wrap in cellophane with ribbons, or in gift tins. They’re great for birthdays, holidays, or as wedding favors.
Can I make chocolate covered Oreos in advance?
Yes, you can make them a few days early. Store them in an airtight container with parchment paper between layers. This keeps them fresh and prevents sticking.
Are there any dietary alternatives for chocolate coating?
Use vegan, sugar-free, or dairy-free chocolate for different diets. This way, you can still enjoy delicious chocolate covered Oreos.


